As promised, I finished up the left front this weekend and am finally able to proceed with the series. I know I had mentioned talking about picking up stitches, but how could I leave out the very important process of blocking! Shame on me!
I know there are people of both the wet block camp and steam block camp out there, but personally, I belong to the steam block camp - for the most part anyway. There is just something about putting your brand new sweater in a tub of water that really scares me! In fact, washing my sweaters brings about so much anxiety that it's really not funny.
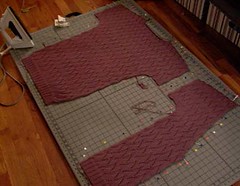
So I start by grabbing my sweater parts, pins, blocking board and measuring tape. I lay everything out matching the measurements from my sketch book to the sweater and pin everything down. The blocking board makes this process an absolute charm, by the way! I used to pin everything out on a towel on the floor, which worked, but I hated it and it took double the time. In fact, honestly, before the blocking board I have to admit I didn't really do too much proper blocking to size. It would get a shot of steam from the iron to smooth the edges for seaming, and that was about it. Don't have a blocking board? You know how you never know what you want for your b-day/Christmas/Hanukkah/other holiday? Exactly! :)
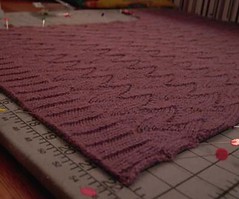
So we have everything pinned down and even, so now I hit it with a good amount of steam being careful not to touch the iron to the surface. Sometimes with stubborn seams, you'll need to use the tip of the iron a bit but try your best not to make contact if you don't need to.
After steaming, the pieces will be a tiny bit damp, so I let them dry for a bit before unpinning them. And after unpinning, I still let them sit for a half hour or more just in case the knitting wants to pull back to shape on it's own. Trust me, being patient will pay off in the end! As with swatching, proper blocking is very important for a pleasant outcome of your garment.
Next up: picking up stitches for the neck and buttonband and placing buttonholes.
