
Yay! The back is finished and I'm ready to move onto the front! If this was a pullover, I could just cast on the same amount of stitches and follow the back numbers until I got to the front neckline, but no such luck. I need to figure out how many stitches to cast on for each front taking into account the button placket.
I cast on a total of 95 sts for the back, so we'll start by dividing that in half which gives me 47.5 stitches. Don't like that, so I go down to 47. 47 doesn't work with the 2x2 ribbing, so I go down one more to 46. But I also have to account for a button placket here, which will be 1.25" wide which would take up about 6 stitches. The 6 stitches then are divided in half (the placket sits evenly over the center front) so we now have43 sts to work with. Again, this doesn't work with the 2x2 rib, so let's try 42. Now I need to check and see if the 42 stitches work with my lace pattern (42-4=38, 38/7=5.42......) nope. So I figure out that I either need 39 stitches or 46 stitches. I decide to go with 46, even though it's 1/2 of my total back. It's always better to go bigger with a button placket since they tend to pull.
So I cast on, work my rib and pattern til I have 15" worked. It's now time to figure out the neck decrease frequency.
On the half, I have 24 neck stitches to decrease and 14.5" to work them, or 116 rows. If we divide 116 by 24 we get 4.8333333.... hmm, not so even. So what do I do? Well, we have a special formula for uneven, unruly numbers like this.
1. I take the 2 even numbers that are closest to the 4.8333 - which are 4 and 6 (these are your frequency numbers).
2. Next I multiply the total number of decreases by the first number which is 4 (24x4=96)
3. Now subtract 96 from the total number of rows (116-96=20)
4. Divide 20 by 2 (20/2=10)
5. Multiply second decrease number (6) by 10 (6x10=60 rows)
6. Subtract 60 from 116 (116-60=56 rows)
7. Divide 56 rows by 4 (56/4=14)
8. Divide 60 rows by 6 (60/6=10)
So after all that, I determined that my decrease frequency is every 4th row 14 times, then every 6th row 10 times. I'm sure this might not make much sense, but if you pick up Maggie Righetti's book Sweater Design in Plain English, it will make MUCH more sense.
At the same time I'm doing all this neck decrease business, I'm also following all the underarm shaping and shoulder shaping as established on the back. And here's what I end up with:
A left front! ok, there was supposed to be a picture here, but things have been a bit crazy around these parts lately! I don't want to delay the post any longer, so please us your ultra creative mind to picture a left front :) (I actually wrote this on 3/15!)
This is it for the math for awhile - at least until I get to the button placket. The second front will be knit up exactly as the first. To make absolutely sure they actually do knit up the same, I keep a small 3x4 notebook handy to mark all of my decreases and rows. It's especially important in this case since I am working in pattern and would like it to match up evenly at the side seams and across the front. The little book also helps when you put the project down for a day or week or year or two. It's always easy to pick up where you left off.
Friday, March 30, 2007
Monday, March 26, 2007
The Yarn Harlot visits FIT
I'm a bit late with this post, but when I had gotten home from the event on Thursday night, my computer would not boot up. Apparently the technically challenged DB had succeeded in giving my computer a nasty virus. He won't be allowed near my computer where all my precious knitting pictures are stored any time soon....
So the Harlot. It was a pretty full house and she talked for about 2 or 2 1/2 hours about how knitters are misunderstood and why we should commend respect from the muggles. Various good deeds were done for the night with knitters working away on squares for Warm Up America, hats were collected for babies in other countries, and money was collected for Doctors Without Borders. I could go into more detail, but I'm sure the event has been covered sufficiently elsewhere.

Full House

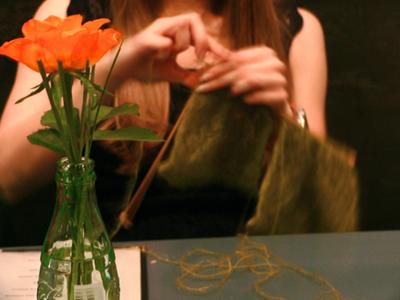
Bad blurry picture of the Harlot
There were quite a few knitters who had come from long distances, which was pretty impressive: England, Switzerland, Virginia, California - just to name a few. I was even recognized by a far away knitter from (I believe) Switzerland - or at least she recognized Tatami. It was kind of neat!
So the Harlot. It was a pretty full house and she talked for about 2 or 2 1/2 hours about how knitters are misunderstood and why we should commend respect from the muggles. Various good deeds were done for the night with knitters working away on squares for Warm Up America, hats were collected for babies in other countries, and money was collected for Doctors Without Borders. I could go into more detail, but I'm sure the event has been covered sufficiently elsewhere.
Full House
Bad blurry picture of the Harlot
There were quite a few knitters who had come from long distances, which was pretty impressive: England, Switzerland, Virginia, California - just to name a few. I was even recognized by a far away knitter from (I believe) Switzerland - or at least she recognized Tatami. It was kind of neat!
Thursday, March 22, 2007
Preparing for "Represent"
The Yarn Harlot will be at my alma mater, FIT tonight to kick off her new book release! I wish I could join in on more festivities of the day, such as a sock picture in the park, being in the crowd at the Today Show, or participating in a yarn crawl - but this girl's gotta work for a living and taking off for the day is not an option. I'm happy enough to be able to join the (hopefully) 750 knitters in the auditorium at 6pm. It's going to be great!
Speaking of work, it has been crazier than normal lately. We are preparing for Holiday 2007 market and the new sweater designs have been flying off the imac the past week and a half. I estimate my assistant and I have put out another 100-75 sweater styles in just this short time. I need a vacation!
The upswing in my full time job has put my knitting on hold for the minute, hence delaying the "series" a bit. I'm just way too tired when I get home to even think about picking up my knitting, let alone writing a blog post about math. I'm sure you all sympathize!
I need to get back in the swing of things soon though, I have many projects on the horizon. Take a look at my newest yarn shipment from One Planet:
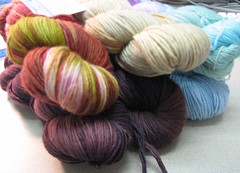
This will eventually become 3 secret projects. Yes, we will be back in the secret phase soon!
And I also received my Rowan DK Wool for the baby project. The color is a bit brighter than I expected, but since I'm a green person I don't mind! I need to get this on the needles quick and find out when the shower is. That's the problem when it's the boy's family - info doesn't get passed down quite as quickly!
I hope to see some other NYC knitters tonight! Represent! :)
Speaking of work, it has been crazier than normal lately. We are preparing for Holiday 2007 market and the new sweater designs have been flying off the imac the past week and a half. I estimate my assistant and I have put out another 100-75 sweater styles in just this short time. I need a vacation!
The upswing in my full time job has put my knitting on hold for the minute, hence delaying the "series" a bit. I'm just way too tired when I get home to even think about picking up my knitting, let alone writing a blog post about math. I'm sure you all sympathize!
I need to get back in the swing of things soon though, I have many projects on the horizon. Take a look at my newest yarn shipment from One Planet:
This will eventually become 3 secret projects. Yes, we will be back in the secret phase soon!
And I also received my Rowan DK Wool for the baby project. The color is a bit brighter than I expected, but since I'm a green person I don't mind! I need to get this on the needles quick and find out when the shower is. That's the problem when it's the boy's family - info doesn't get passed down quite as quickly!
I hope to see some other NYC knitters tonight! Represent! :)
Thursday, March 15, 2007
The Design Process - Yet More Math
After working the bust increases, it's now time to shape the underarm seam for the doleman-like sleeve.
Instead of using a set formula for the increases, I drew out a chart to make sure the shape is what I wanted. I wanted the increases to be worked over 2", which according to my row gauge is 16 rows total.
So I got out the trusty graph paper and started drawing. Here's what I came up with:
 So I'm increasing a total of 11 stitches over 15 rows (1 stitch every other row 4 times, then 1 stitch every row 7 times) - close enough to my 16 total.
After working my underarm increases, I now need to figure out how many stitches to cast on for the sleeve at both ends of the back.
I want the sleeves to be about 10 1/4" long from the shoulder to the cuff. So 10.25 x 2 (sleeves) =20.5" + 9" (neck) = 29.5" wide. Then I subtract the body 29.5" - 18" = 11.5" for the underarm seams. But I have 2 underarm seams, so I need to divide by 2 = 5.75" for each side or 31 stitches wide (5.75 x 5.5=31).
I already increased 11 stitches for the underarm shaping, so I can subtract that from the 31, so we have 20 stitches to increase.
But before I cast 20 more stitches on for the sleeve, I need to make sure the total number of stitches follows our stitch repeat numbers (7 sts + 4). 99 sts + 22 sts + 40 sts = 161 sts total. 161-4=157, 157/7= 22.428...... = not going to work! So I messed around a bit with the numbers and figured out I needed to add 15 sts on each side (99 + 22 + 30=151 sts. 151 -4=147, 147/7=21 repeats). The sleeve will be about 1" shorter on each side, but having the numbers work out makes it easier to place the repeats correctly so I can live with that.
After casting on the extra stitches, I was able to veg out for awhile and knit even for 7 1/2". Once I hit that point, it was time to think about the shoulder shaping.
I decided I wanted to try some short row shaping on the shoulders since I've never done it in a design before. Well, I wanted to do short row shaping, but with the lace pattern going on, I ended up with a lot more stitches than I was supposed to, so out it came! I did a traditional bind off instead and slipped the first stitch of each bind off row to avoid the ugly "stair step" edge you get if you don't do this. To figure out how many stitches I needed to decrease, I subtracted the neck opening stitches from the sleeve stitches and have 51 stitches to decrease on each shoulder over 14 rows. Because I can only decrease one side per row, I actually only have 7 rows to decrease over. So 51/7= 7 with a remainder of 2. So I'll be binding off 7 stitches 7 times and then have 2 sts at the end left over.
There will also be a bit of back neck shaping involved which will involve separating the back at a certain point, but I think it's safe to say that I'm pretty sure you just want to see a progress picture by now:

Next up: Math for a cardigan front and neck decreases - fun!
Thanks to everyone who made a suggestion in my time of crisis! I decided on the Rowan DK Wool from elann.com for the baby goods. I love Rowan and hey, it was cheap! If it wasn't a budget project, I probably would have gone for the Zara, but I'm sure there will be a next time!
Instead of using a set formula for the increases, I drew out a chart to make sure the shape is what I wanted. I wanted the increases to be worked over 2", which according to my row gauge is 16 rows total.
So I got out the trusty graph paper and started drawing. Here's what I came up with:
 So I'm increasing a total of 11 stitches over 15 rows (1 stitch every other row 4 times, then 1 stitch every row 7 times) - close enough to my 16 total.
After working my underarm increases, I now need to figure out how many stitches to cast on for the sleeve at both ends of the back.
I want the sleeves to be about 10 1/4" long from the shoulder to the cuff. So 10.25 x 2 (sleeves) =20.5" + 9" (neck) = 29.5" wide. Then I subtract the body 29.5" - 18" = 11.5" for the underarm seams. But I have 2 underarm seams, so I need to divide by 2 = 5.75" for each side or 31 stitches wide (5.75 x 5.5=31).
I already increased 11 stitches for the underarm shaping, so I can subtract that from the 31, so we have 20 stitches to increase.
But before I cast 20 more stitches on for the sleeve, I need to make sure the total number of stitches follows our stitch repeat numbers (7 sts + 4). 99 sts + 22 sts + 40 sts = 161 sts total. 161-4=157, 157/7= 22.428...... = not going to work! So I messed around a bit with the numbers and figured out I needed to add 15 sts on each side (99 + 22 + 30=151 sts. 151 -4=147, 147/7=21 repeats). The sleeve will be about 1" shorter on each side, but having the numbers work out makes it easier to place the repeats correctly so I can live with that.
After casting on the extra stitches, I was able to veg out for awhile and knit even for 7 1/2". Once I hit that point, it was time to think about the shoulder shaping.
There will also be a bit of back neck shaping involved which will involve separating the back at a certain point, but I think it's safe to say that I'm pretty sure you just want to see a progress picture by now:

Next up: Math for a cardigan front and neck decreases - fun!
Thanks to everyone who made a suggestion in my time of crisis! I decided on the Rowan DK Wool from elann.com for the baby goods. I love Rowan and hey, it was cheap! If it wasn't a budget project, I probably would have gone for the Zara, but I'm sure there will be a next time!
Wednesday, March 14, 2007
Help!
I'm wondering if anyone can suggest a nice DK weight yarn for a baby sweater. I'm making the Pea Pod Baby Set from Interweave and don't really want to use the Debbie Bliss it calls for. Does anyone have a suggestion of something that is machine washable, is soft and holds up well without pilling? Oh, and did I mention cheap?
I ordered some Jaeger Baby Merino DK from Webs and they totally disappointed me. I placed the order on Sunday and today.......3 days later......they email me to tell me it's out of stock! Meanwhile, I go back to the website and it says they still have 6 skeins in stock (they had like a billion when I ordered). Hmm, needless to say, I don't think I'll be ordering anything from them EVER again! So I'm in panic mode now and don't know what to do. I know it's not that big of a deal and I can get this yarn elsewhere, but I lost 3 days on a tight schedule project! And now I'm not so sure I want this yarn now since I'm going to pay much more somewhere else. Sigh.
I ordered some Jaeger Baby Merino DK from Webs and they totally disappointed me. I placed the order on Sunday and today.......3 days later......they email me to tell me it's out of stock! Meanwhile, I go back to the website and it says they still have 6 skeins in stock (they had like a billion when I ordered). Hmm, needless to say, I don't think I'll be ordering anything from them EVER again! So I'm in panic mode now and don't know what to do. I know it's not that big of a deal and I can get this yarn elsewhere, but I lost 3 days on a tight schedule project! And now I'm not so sure I want this yarn now since I'm going to pay much more somewhere else. Sigh.
Monday, March 12, 2007
The Design Process - More Math
Sorry for the delay in the series! Last week, I was so busy with work (it's market week - ugh!) that I was hardly able to knit a stitch. Even if I had tried to knit a stitch, I was so tired I don't think I would have been able to. Buyers zap the energy right out of you!
When we last left off, I had explained a little bit about the math that needed to be done to get me up to the waist point. I also had to make a decision about the chest and if I wanted to decrease or increase at this point.
I decided to increase for the bust and I changed a few measurements around. So here's the updated schematic:
 For the bust to measure 18", I need 99 sts. There are 95 sts on my needle, so I need to increase 4 sts total - 2 sts on each side (99-95=4, 4/2=2). Now I just need to figure out the spacing of those increases.
I have 2 increases to make and 24 rows to work them. To keep a nice slope, you need to space the increases out evenly or your side seams can look a bit odd. In this case, since I only have 2 sts to increase and it's actually pretty easy to figure out. I increase the 1st stitch after completing 15" of the body, then I increase 1 stitch more 24 rows later.
 Not too much math involved on the increases on this sample, but what if I wanted to increase more stitches over the same 3"?
 Just for example's sake, let's say I needed 4 increases on each side instead of 2 and had the same 24 rows to work with. I would divide 24 rows into 3 intervals (space between each inc) and would get 8. So I would need to increase 1 stitch every 8 rows 4 times. This works out perfectly and each increase is on the right side (since it's an even number). It doesn't always work out so easily and sometimes the numbers need to be fudged a bit, but we'll leave that for a later lesson - like the neck decreases.
Next up: shaping the underarm seams and shoulder decreasing
Monday, March 05, 2007
The Starla Cardi Revealed
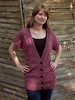
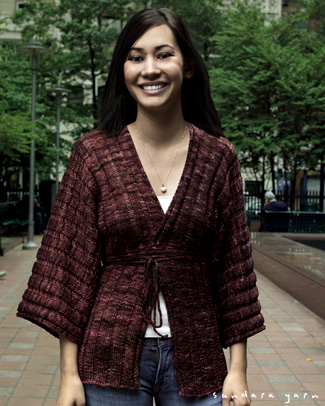
 I'd like to introduce another Secret Project: The Starla Cardi! Knit up in Lanas Puras Melosa - Worsted Weight, it's sure to fly off your needles.
If you head on over to One Planet Yarn and Fiber you will find details how to purchase the yarn for this project at 10% off!
Starla Cardi
by Melissa Wehrle
DIFFICULTY
Beginner
SIZE
2/4 (6/8, 10/12, 14/16)
FINISHED MEASUREMENTS
Chest at Underarm: 21 (24.5, 28, 31)"/53 (62, 71, 79)cm
Finished Length: 17.5 (18, 18.5, 19)"/44 (46, 47, 48)cm
MATERIALS

- Lanas Puras Melosa - Worsted Weight
(100% Merino Wool, 3 oz, 215 yds), 3 (3, 4, 4) skeins Margarita
- One 24" (61 cm) or longer US size 8 (5 mm) circular needle or size to obtain correct gauge.
- Four stitch markers
- Three stitch holders
- Tapestry needle
- ½ yd 7/8" wide ribbon
- Six ¾" diameter buttons
GAUGE
18 sts and 25 rows = 4"/10 cm in Reverse St st with US size 8 (5 mm) needles or size to obtain gauge
The body is worked in one peice up to the armholes. Each section is then split and worked separately to the shoulders.
More on the design series soon, hit a little snag with the armhole increases, but we're all good to go now!
Subscribe to:
Posts (Atom)


